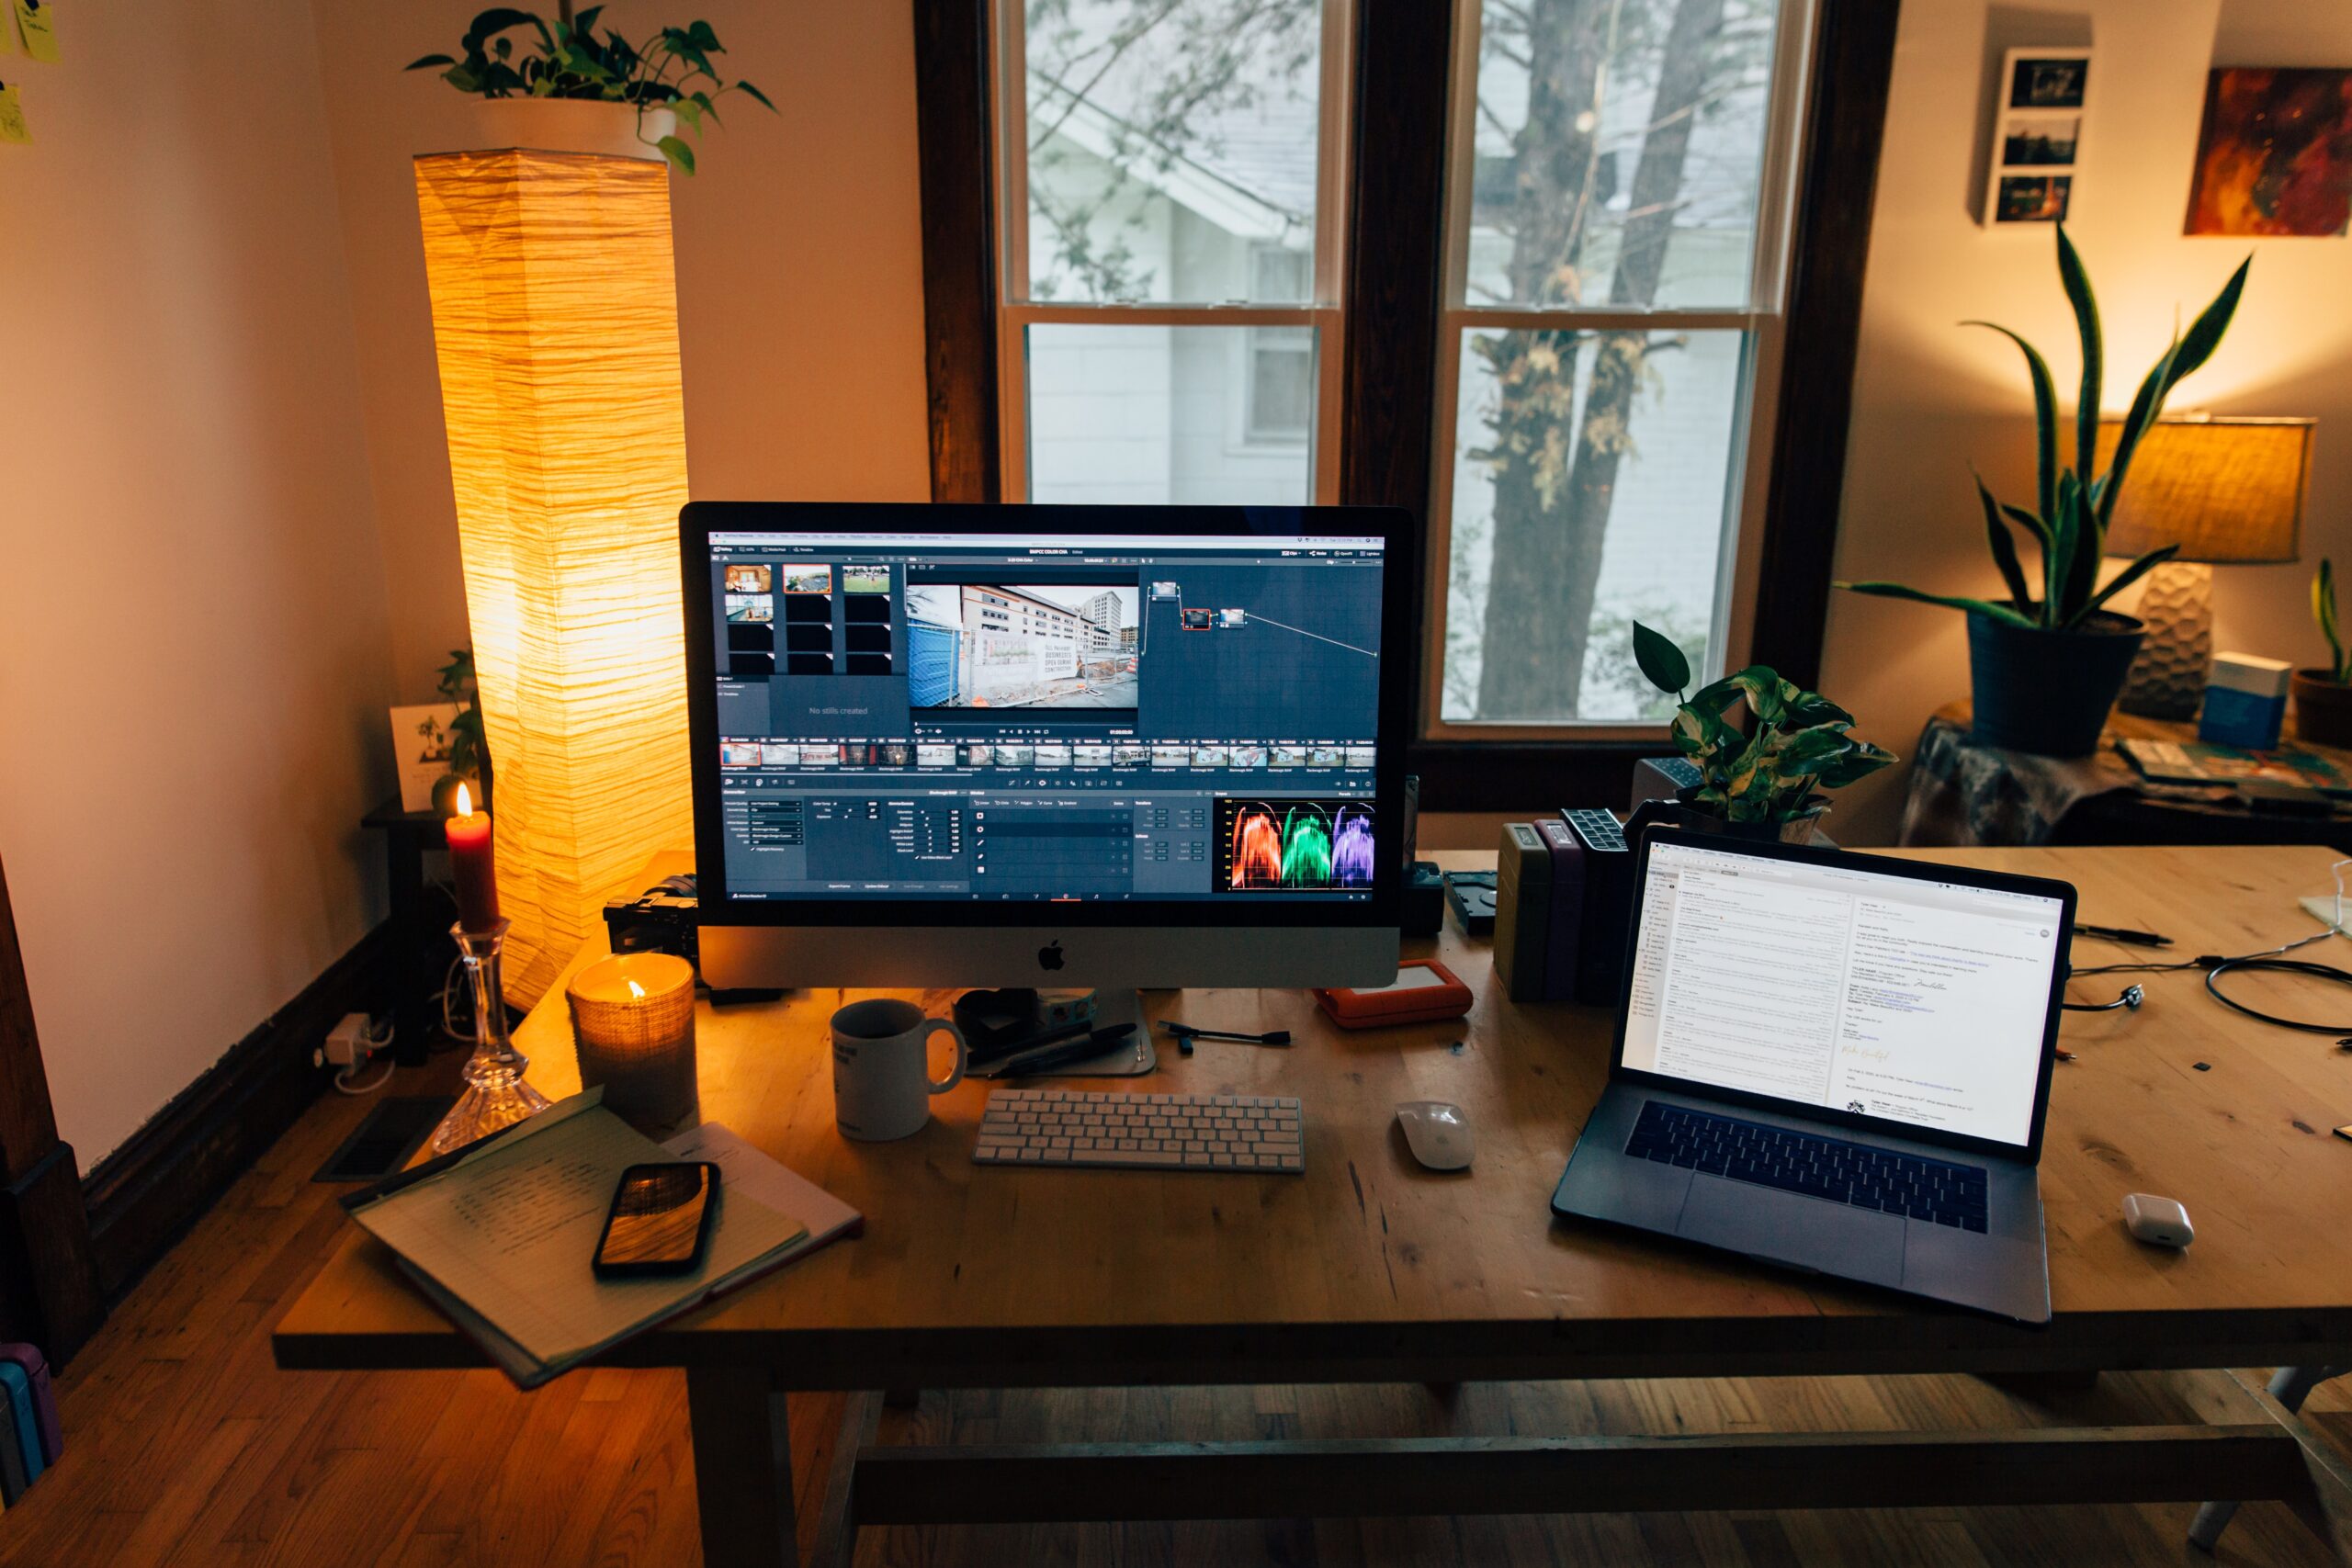
Take your video editing skills to the next level with these essential tips and tricks for using Premiere Pro to create engaging, high-quality content for your audience.
Welcome to the world of video editing, where the magic happens behind the scenes, transforming raw, uncut footage into compelling stories that captivate your audience and invite them into a story.
As a videographer, you know that every detail counts, every frame matters, and every cut helps brings your vision to life. Editing video is time consuming and there is a lot to creating a final product that you’re proud of.
And that’s where Premiere Pro comes in. It’s not just about chopping and trimming – it’s about marketing your brand, speaking to your audience, narrating your story, and making your mark in the digital world. Whether you’re a seasoned pro or just beginning your journey in video editing, I’ve put together a list of ten tips that I use on a daily basis that I think can help you elevate your video projects and workflow. These ten tips could be your game changer, your stepping stone to the next level.
So let’s take a deep dive together into the realm of Premiere Pro and unravel the secrets to creating breathtaking videos with ease and efficiency. Buckle up, because you’re about to elevate your video content like never before and no matter where you are as a video editor, I hope you get something out of this post.
Here is a list of all the tips I’ve included in this post:
- Master Your Shortcuts in Premiere Pro
- Utilize Adjustment Layers
- Optimize Your Workspace
- Color Grading
- Use Markers
- Dynamic Link with After Effects
- Nested Sequences
- Proxy Editing
- Automate to Sequence
- Export Settings
Master Your Shortcuts
Keyboard shortcuts can dramatically speed up your editing process. Spend some time learning and customizing these to your workflow.
Mastering keyboard shortcuts in Premiere Pro is similar to learning a new language, and the more fluent you are in that language, the faster you’re able to communicate seamlessly with your editing software and drastically accelerate your editing process. Imagine having a sentence to write, but instead of typing it out word by word, you have specific keys that instantly input the whole sentence. That’s the power of keyboard shortcuts. Whether it’s cutting a clip, moving a frame, or applying a transition, keyboard shortcuts turn these multiple-click tasks into single-key maneuvers, saving you valuable seconds that accumulate into hours in a project.
The more you use your keyboard shortcuts in Premiere Pro, the more second nature they become. To be completely transparent with you, this section was hard for me to write because I don’t even think about keyboard shortcuts anymore, they’re just stored in my brain.
The first thing that you should know is that Premiere Pro’s keyboard shortcuts aren’t set in stone. They are fully customizable, providing you the liberty to tailor them according to your editing style and workflow. If there’s a specific sequence of tasks you constantly use, you can create a unique keyboard shortcut for it. This personalization aspect of Premiere Pro not only makes it versatile to accommodate different editing styles, but also enhances the editor’s comfort, efficiency, and speed.
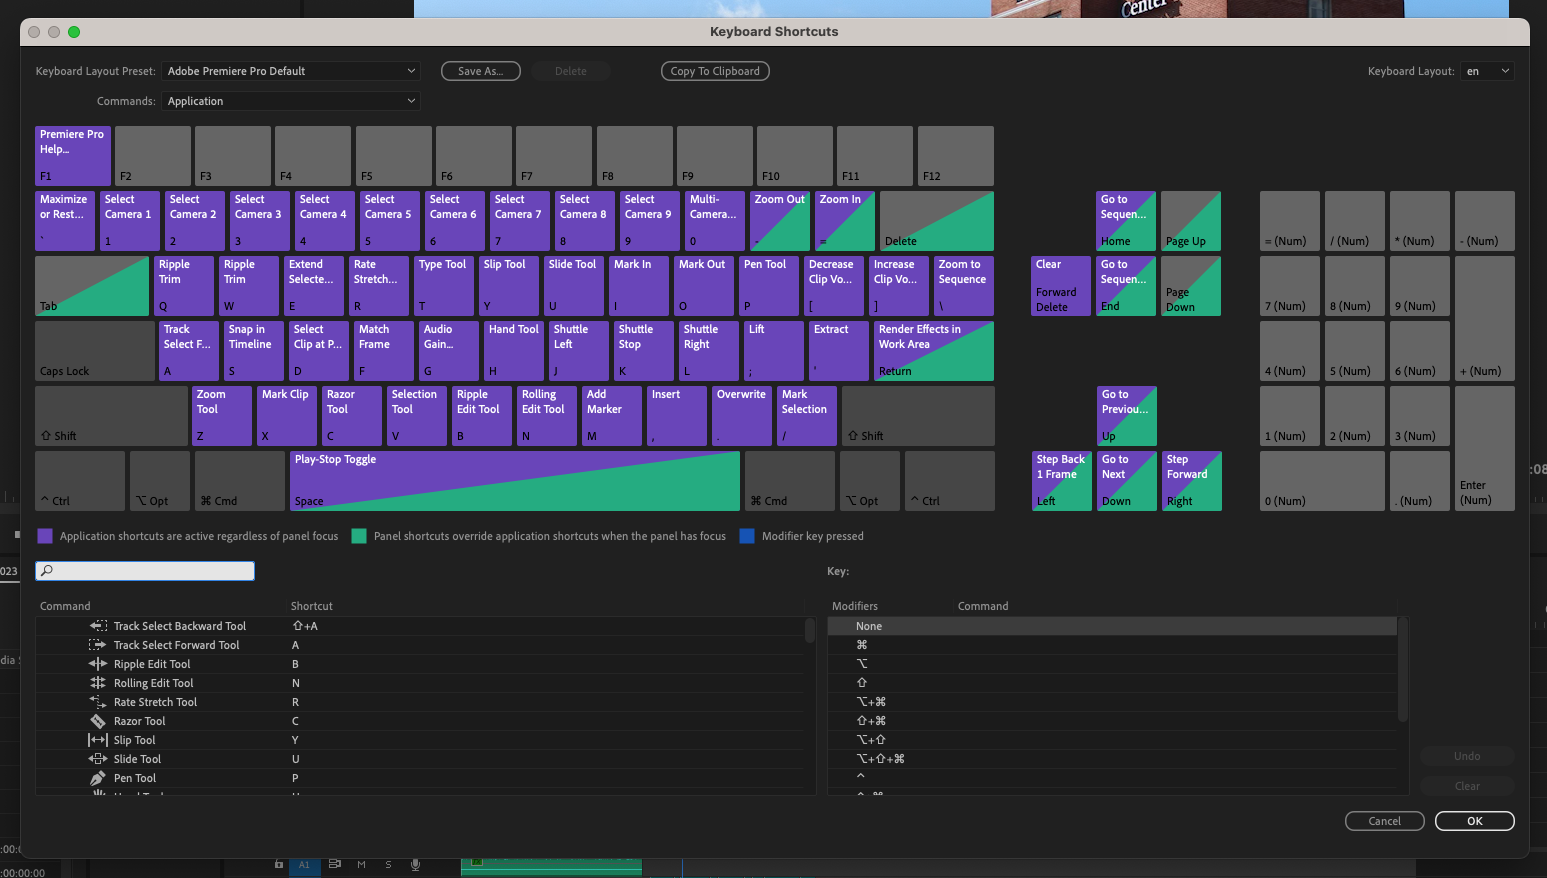
To find your Keyboard Shortcuts, on a Mac select “Premiere Pro” from the Menu bar and then select “Keyboard Shortcuts”. On a Windows machine, Select the Edit Menu and then “Keyboard Shortcuts”. When you do this a window will pop-up and you’ll be able to see all your shortcuts and edit them as you desire.
Though there’s no limit to the number of shortcuts you can create and use, there are some essential ones that every Premiere Pro user should be familiar with. The ‘C’ key brings up the Razor tool which allows you to make quick cuts. Pressing ‘V’ allows you to select clips, and ‘Command+D’ (or ‘Control+D’ for Windows users) to apply default transitions. These are the basic keyboard shortcuts that I use multiple times a day.
For some more advanced editing, the ‘A’ key selects all the clips in front of your cursor on a track from the spot you click and the Shift+A key selects all the clips behind on a track from the spot you click. To Ripple Edit, press the ‘B’ Key. To render a project, select “Enter”. The ‘Up’ and ‘Down’ arrow keys for moving between clips, and ‘+/-‘ for zooming in and out of the timeline are also simple yet effective time-saving shortcuts.
Adobe has all their default keyboard shortcuts listed on their website.
These shortcuts represent the foundation upon which you can build your own set of customized shortcuts, optimizing your editing process to an entirely new level of efficiency.
Here is a keyboard layout that Premiere Pro provides when you bring up their Keyboard Shortcut Menu:
Utilize Adjustment Layers
Instead of applying effects and corrections to each clip individually, use adjustment layers to apply changes across multiple clips at once.
Adjustment layers in Premiere Pro are immensely powerful tools that can streamline your editing process and take your project to another level of professionalism and efficiency. At their most basic, adjustment layers are a kind of ‘blank canvas’ that sits above your video tracks. Any effects or changes you apply to this layer will affect all the clips beneath it in your sequence. This means you can apply a single effect (like a color correction or a film grain overlay) to an adjustment layer, and it will affect every clip underneath.
For instance, suppose you’re working on a project where you want to apply a certain color grade to multiple clips. Instead of manually applying the color effect to each clip, you can simply add an adjustment layer, apply the color effect to it, and position it above the clips you want to influence. Every clip under the adjustment layer will now carry the same color effect.
This method isn’t just efficient — it also promotes consistency throughout your project. It ensures that your color grading, filters, or any other effects are uniform across all affected clips, lending your project a professional and cohesive feel.
Adjustment layers can host a plethora of effects, the limit is your creativity. For instance, you can apply the ‘Lumetri Color’ effect to an adjustment layer to alter the mood and tone of your scene. If you are looking to add an old-school vibe to your video, you can use a ‘Film Grain’ effect. Or maybe you want to create a dreamy aesthetic? A ‘Gaussian Blur’ effect could do the trick. Remember that you’re not limited to a single effect per adjustment layer — you can stack multiple effects to create your unique look.
By understanding and harnessing the power of adjustment layers in Premiere Pro, you can save considerable time and ensure a consistent style throughout your project. It’s a game-changing tool that every videographer should have in their editing arsenal.
There are a few ways to add a new Adjustment Layer to a project this is the easiest:
Click File – New – New Adjustment layer and make sure that the settings match your sequence settings.
Optimize Your Workspace
Premiere Pro’s interface is highly customizable. Arrange your panels in a way that best suits your editing style and project requirements.
Premiere Pro’s flexible workspace is like a playground for video editors, providing a customizable environment that can be molded to meet individual needs and preferences. Customizing your workspace enables you to optimally arrange your tools and panels, ensuring you have immediate access to the features you use most frequently. This personalization saves you from needless menu diving and keeps your editing process streamlined and efficient.
The beauty of workspace customization lies in its adaptability. Different projects may require different tools, and the ability to tailor your workspace according to project needs is an undeniable advantage. For instance, if you’re working on a color grading task, you can arrange your workspace in a way that readily displays the Lumetri Color panel and the scopes you need. Similarly, if you’re working on audio, you can customize your workspace to show the Audio Clip Mixer and Essential Sound panel.
Premiere Pro also allows multiple workspace layouts that you can switch between as needed. This means you can have a dedicated workspace for editing, another for color grading, and another for audio editing. These quick switches can immensely speed up your workflow, eliminating the need to constantly rearrange your panels.
The optimization of your workspace isn’t just about functionality, but also about comfort and experience. A well-organized workspace can reduce visual clutter, helping you focus better on your project. It’s about creating a space where your creativity can flow unrestrained, where your tools are positioned intuitively, and where every aspect of your workspace resonates with your editing style.
When you invest some time in fine-tuning your workspace, you will notice a considerable improvement in your editing speed, efficiency, and overall experience. Remember, Premiere Pro is a tool that’s designed to work for you, and customizing your workspace is a crucial step in making it truly your own.
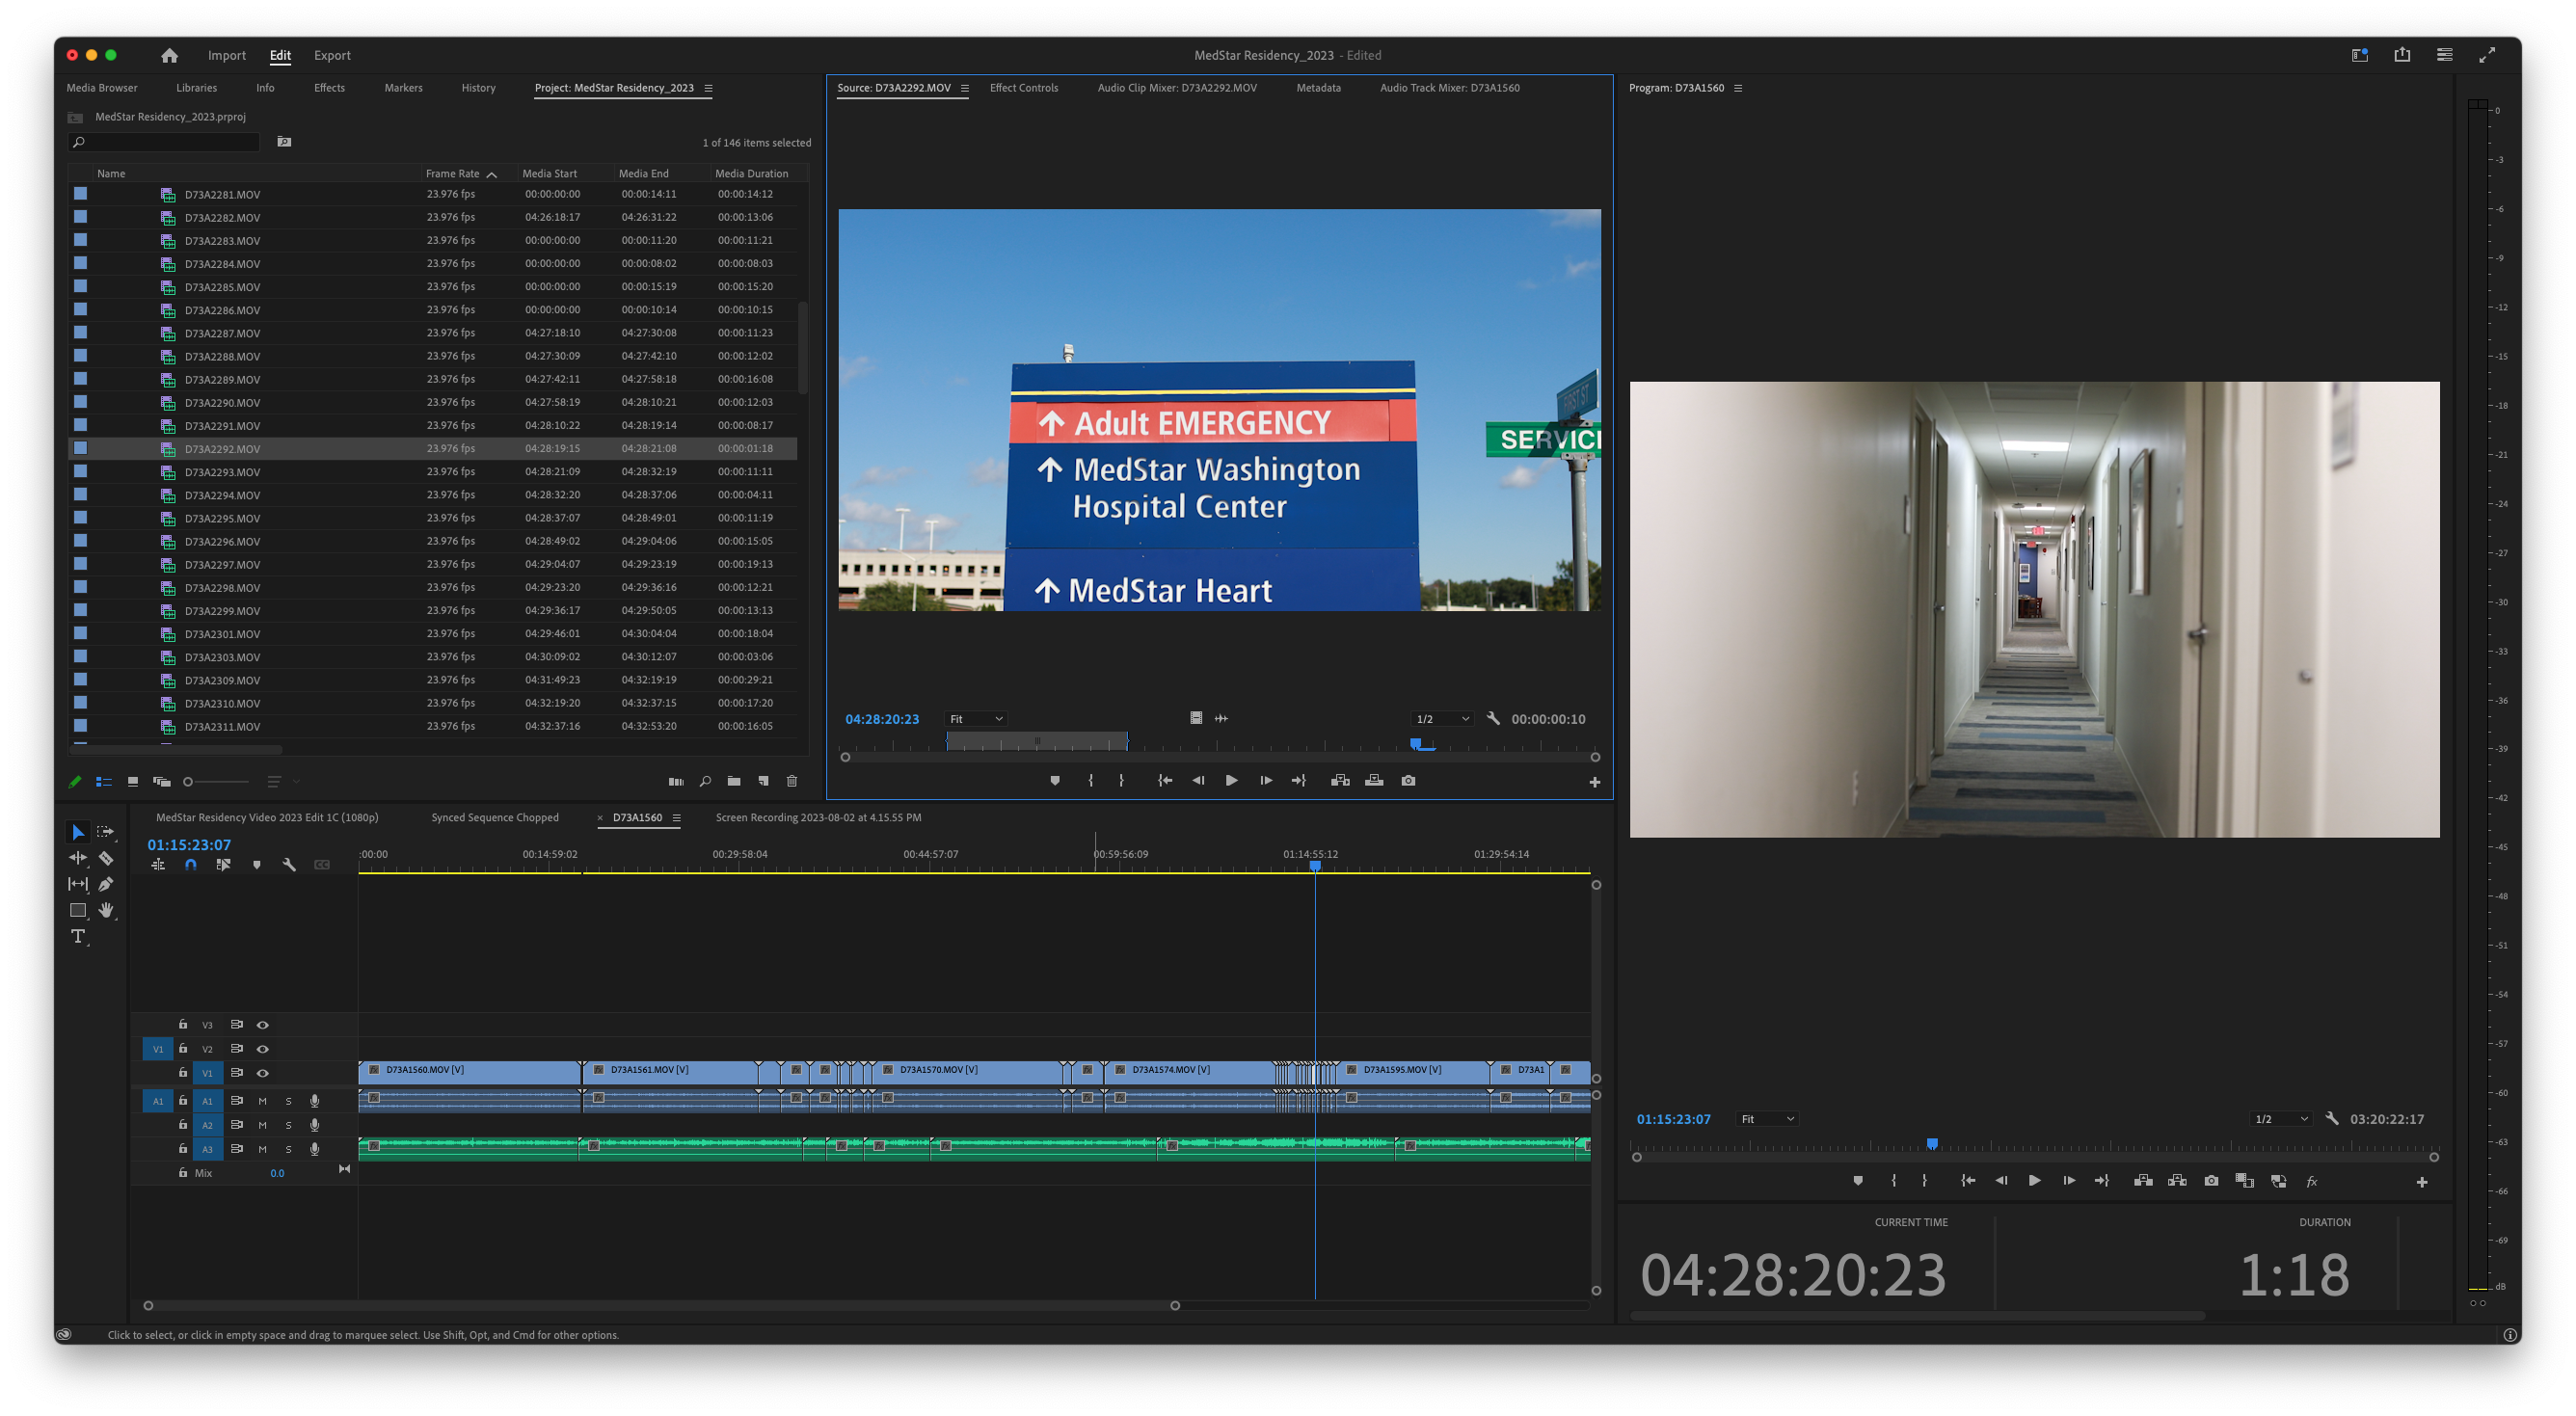
This is how I have my Premiere Pro workspace set up on my desktop:
Color Grading
Explore the Lumetri Color panel. This powerful tool can take your color grading to the next level, giving your video a professional look.
When it comes to video editing, color grading is an art in its own right, a powerful tool that enables you to enhance your footage and give it a professional, cinematic look. It’s not just about making your videos look ‘good’ — it’s about imbuing them with a mood, an atmosphere, and a visual identity that can captivate your audience and hold their attention. With color grading, you get to control the visual narrative of your video, highlighting key elements, setting the tone, and enhancing the overall storytelling process.
The Lumetri Color panel in Premiere Pro is a comprehensive toolset designed to offer an intuitive and efficient color grading process. It includes basic correction tools like white balance, tonal adjustments, and exposure sliders, which allow you to perform fundamental color corrections. Then, it delves into more advanced tools like the creative tab, curves, color wheels, HSL secondary and vignette. Each of these tools gives you extensive control over different aspects of color grading, enabling you to create visually stunning footage.
The Creative tab, for instance, offers an array of Look presets that you can apply to your footage to quickly achieve a certain aesthetic, from vintage film styles to modern, saturated looks. If you want more control over the look of your video, you can use the curves, color wheels, or HSL secondary to manipulate individual color channels, balance your shadows, midtones, and highlights, or isolate and adjust specific colors in your footage.
The Lumetri Color panel is not just powerful but also user-friendly. It’s designed in a way that even beginners can get started with color grading and achieve impressive results. But the real beauty of color grading goes beyond just the technicalities. As a video editor, color grading allows you to infuse your work with your unique aesthetic signature, elevating the visual storytelling and crafting an immersive, engaging viewing experience.
So, don’t shy away from experimenting with color grading in your next project. The Lumetri Color panel in Premiere Pro is your palette, and your footage is your canvas. It’s time to create your masterpiece.
Use Markers
Markers can help you sync your footage with music and sound effects, making your editing more precise and efficient.
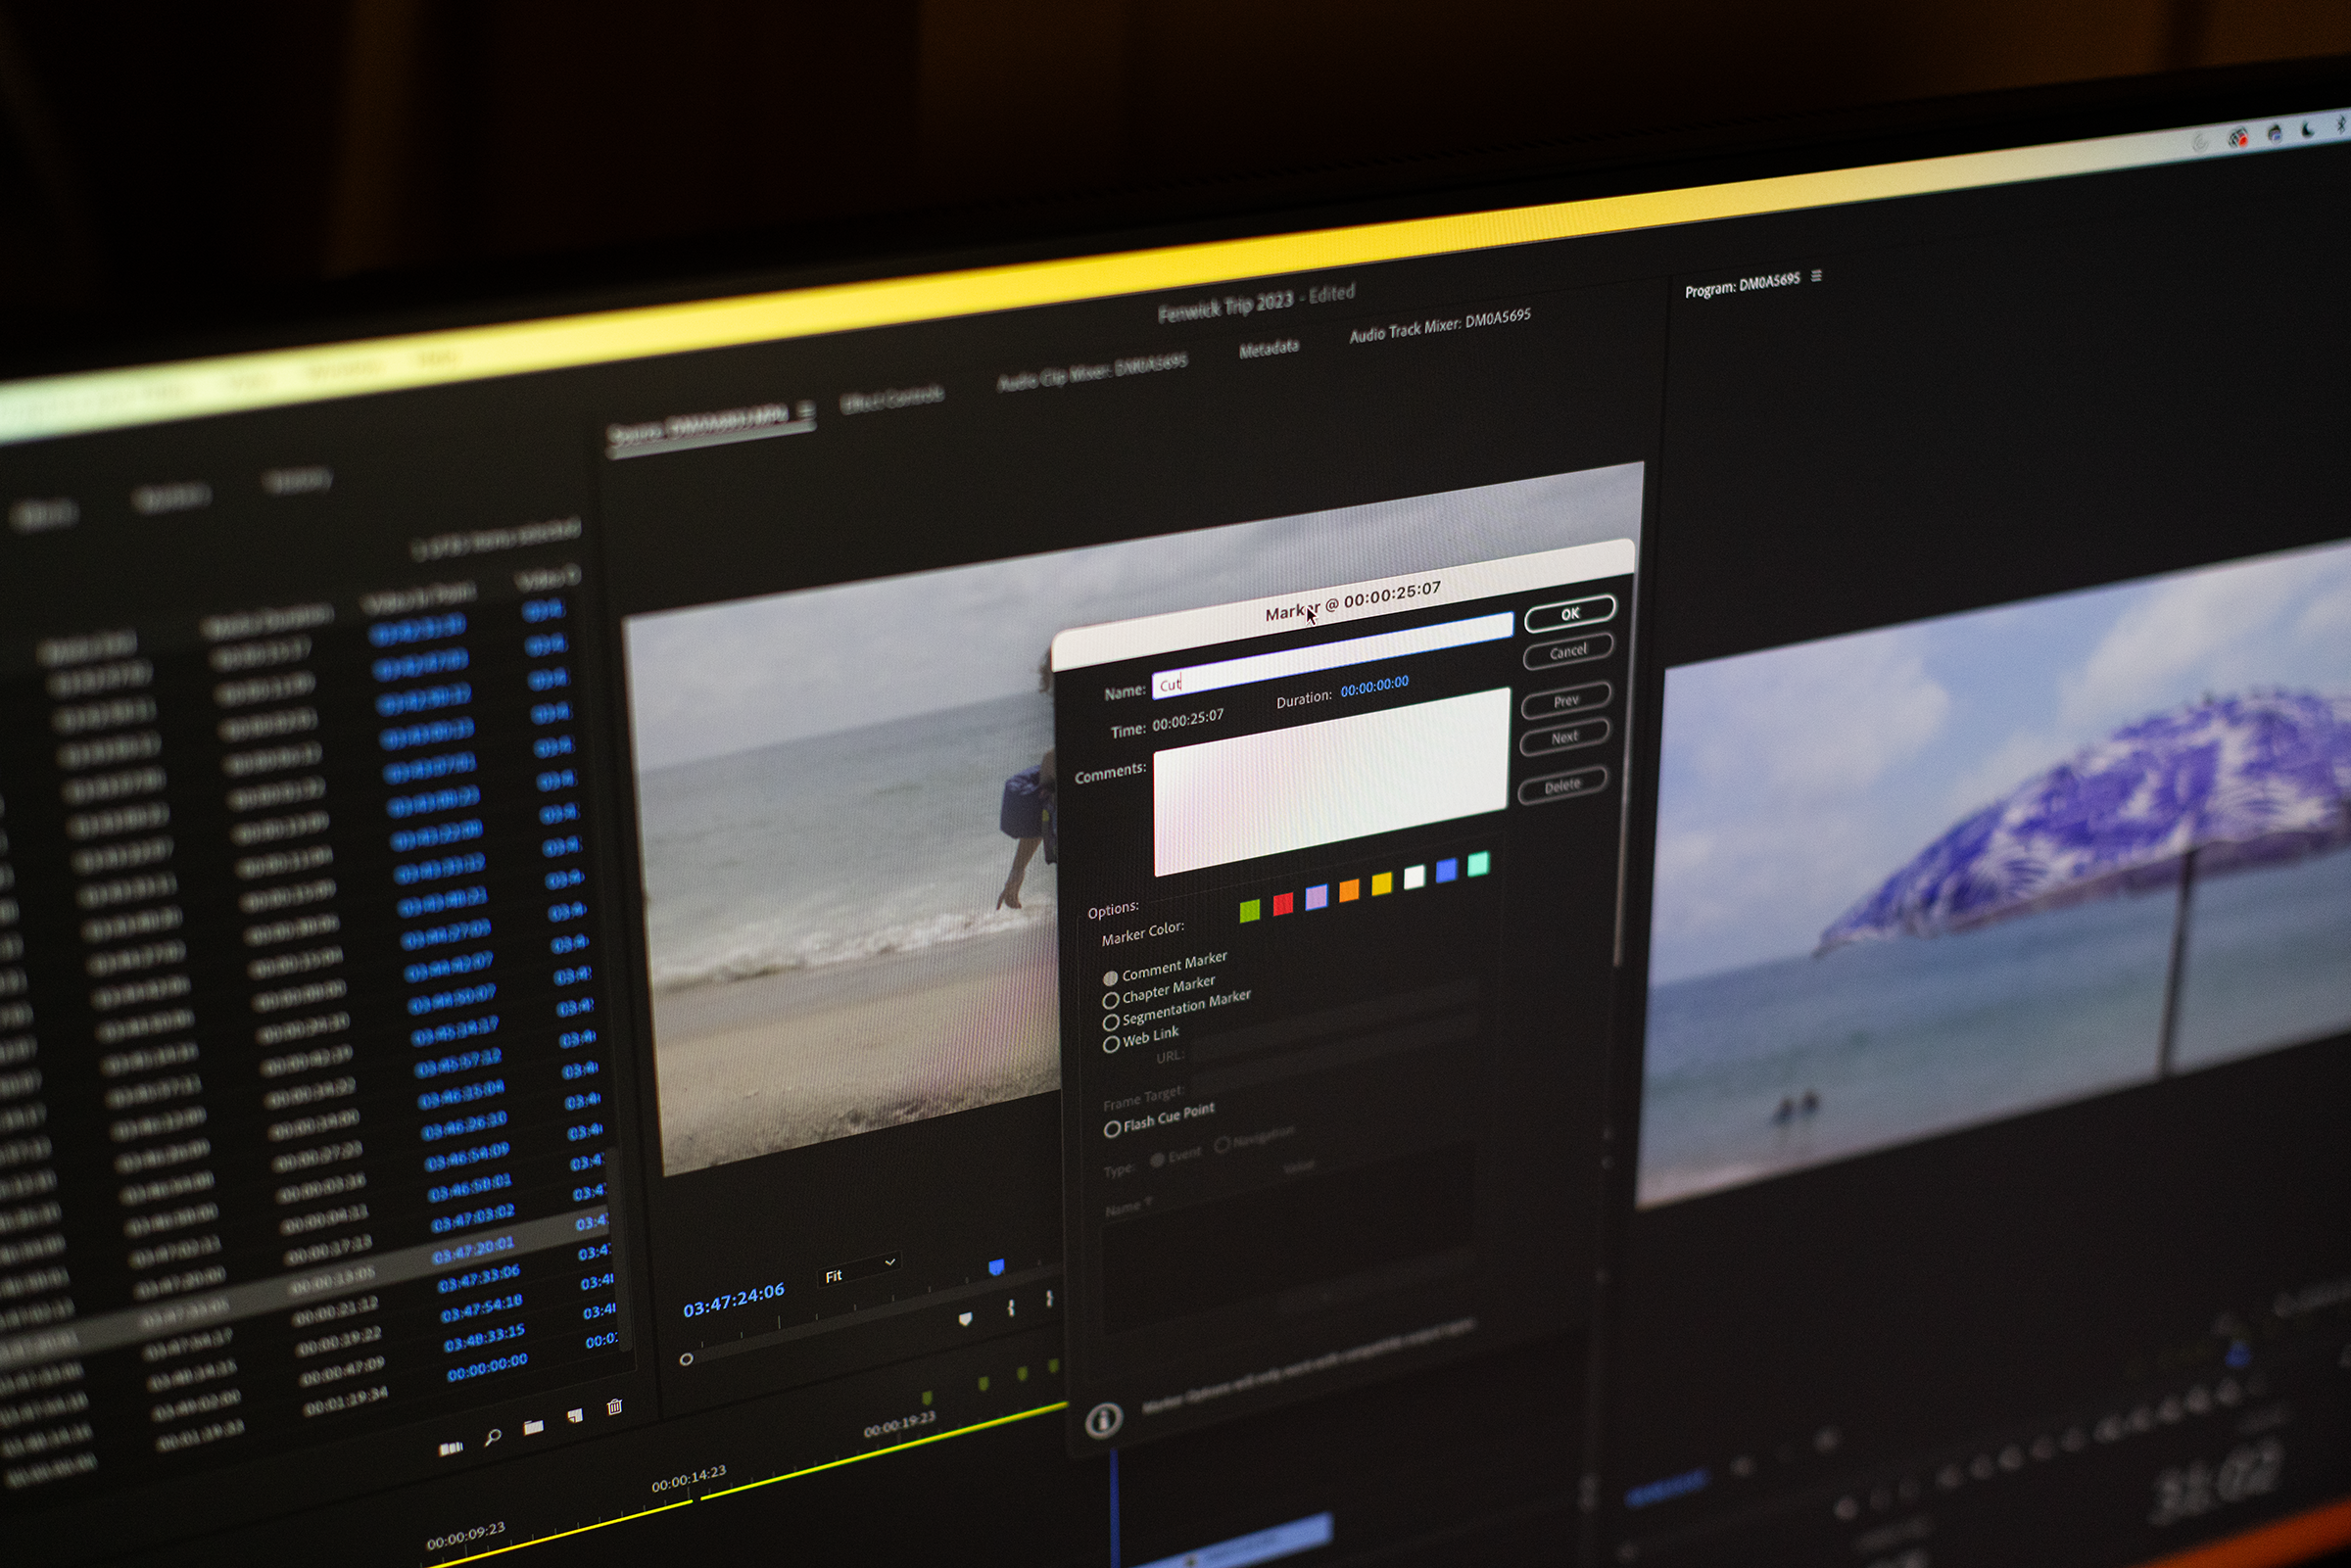
When it comes to video editing, precision is key, and one tool that significantly enhances precision in Premiere Pro is markers. These simple yet powerful aids can help streamline your editing process, making it more efficient and accurate. While often overlooked, markers can be instrumental in elevating your video editing game, particularly when it comes to syncing footage with music and sound effects.
Syncing your footage to music and sound effects can transform an ordinary video into a captivating viewing experience. It’s a technique that can drive the narrative, create rhythm, and significantly increase viewer engagement. However, achieving precise synchronization can be a challenge. This is where markers come in.
Markers are essentially indicators that you can place throughout your timeline to mark specific points in your footage. You can use them to identify where a beat, a sound effect, or a dialogue line occurs in your audio track. Then, you can match these markers with corresponding markers on your video track, ensuring that your visuals align perfectly with your audio.
With markers, you’re not just guessing where a cut needs to be made or where a transition should occur. Instead, you have precise points guiding your editing decisions, enabling you to achieve a tight, seamless audio-visual synchronization. The result is a rhythmically engaging video that can captivate your audience and hold their attention.
So, how do you use markers in Premiere Pro? It’s simple. All you need to do is play your audio track and hit the ‘M’ key on your keyboard every time you hear a beat or a sound where you’d like a visual change to occur. Then, place corresponding markers on your video track where the cuts or transitions should align with the audio markers. Once you have your markers in place, it’s just a matter of making your cuts and transitions align with them.
When editing to music, I personally find it helpful to use markers. This allows me to identify the beats and ensure that my cuts align perfectly with the rhythm. By establishing a captivating rhythm, I can engage viewers and create a seamless viewing experience.
The use of markers can save you considerable time and make your editing process more efficient. They provide a visual roadmap that guides your editing decisions, eliminating guesswork and ensuring a smooth, rhythmic flow in your final video. So next time you’re editing in Premiere Pro, give markers a try. You might be surprised at how much they can improve your video editing workflow.
Dynamic Link with After Effects
If you need to incorporate graphics or visual effects, use the dynamic link to seamlessly switch between Premiere Pro and After Effects.
When it comes to video editing and post-production, Adobe’s suite of tools offers unmatched versatility. One feature that significantly enhances this versatility is Dynamic Link – a powerful tool that allows for seamless collaboration between Premiere Pro and After Effects.
Dynamic Link essentially facilitates a smooth workflow between the two programs, letting you easily transfer and work on your footage across both platforms without the need for tedious rendering or exporting. With Dynamic Link, you can create a composition in After Effects, and then import and work on it directly in Premiere Pro. This can be particularly beneficial when you need to incorporate graphics or visual effects in your video content.
To utilize Dynamic Link, start by creating your visual effects or animated graphics in After Effects. Once you’re satisfied with the composition, save it, then switch to Premiere Pro. In Premiere Pro, go to File > Adobe Dynamic Link > Import After Effects Composition. Then, simply navigate to the After Effects project file, select the composition you want to incorporate, and click ‘OK’.
The beauty of Dynamic Link lies in its real-time functionality. Any changes you make in the After Effects composition will automatically reflect in Premiere Pro, saving you the repetitive task of rendering and importing. It essentially makes the two programs work as one, streamlining your editing process and giving you more time to focus on the creative aspects of your project.
In essence, Dynamic Link is a game-changer for videographers looking to level up their video editing skills. By enabling a seamless switch between Premiere Pro and After Effects, it opens up a realm of creative possibilities, letting you enhance your content with stellar visual effects and sophisticated animations. Don’t hesitate to explore the power of Dynamic Link in your next editing project. It could be the key to achieving that professional edge you’ve been aiming for.
Nested Sequences
When working with complex projects, nested sequences can keep your timeline organized and improve your workflow.
Nested sequences in Premiere Pro are essentially a sequence within a sequence. They are an efficient method for condensing a large amount of video and audio layers into a single track.
If you’re coming from a graphic design background, think of nesting similar as “grouping” where multiple elements can be clustered together and manipulated as one unit. Nested sequences can greatly enhance your video editing workflow, particularly when you are dealing with complex projects with multiple layers.
Cluttered timelines can slow down your editing process, making it more difficult to locate specific clips or make precise edits. This is where nested sequences prove to be a huge help. They allow you to organize your timeline, reduce clutter, and simplify complex sequences. Each nested sequence acts as a single clip, freeing up your timeline and making it easier to navigate. Further, any effects or transitions applied to a nested sequence will affect all the clips within, enabling more efficient editing.
To create a nested sequence, first, select the clips you want to group together on your timeline. Right-click on the selected clips and choose ‘Nest…’. A new window will pop up prompting you to name your nested sequence. After naming it, click ‘OK’. Your selected clips will now be replaced by a single clip on the timeline, which is your nested sequence. To edit the clips within the nested sequence, simply double-click on it, and Premiere Pro will open them in a new timeline.
Nested sequences are an ideal tool for keeping your work organized and your workflow smooth. By grouping related clips into a single unit, they simplify your timeline and allow for more focused and efficient editing. Whether you’re working on a complex documentary or a multi-layered marketing video, consider leveraging the power of nested sequences in your next Premiere Pro project.
Proxy Editing
If your system is lagging due to high-resolution footage, use proxy editing. This will create low-resolution copies for editing, and switch back to high-resolution for final rendering.
Proxy Editing in Premiere Pro is a powerful feature designed to enhance your video editing workflow when dealing with high-resolution footage. In essence, proxy editing involves the creation of low-resolution versions, or ‘proxies’, of your high-resolution files. These proxies are lighter and easier to work with, ensuring a smoother, lag-free editing experience. When your editing is done, Premiere Pro automatically switches back to the high-resolution files for the final render.
This feature can be particularly beneficial in several scenarios. For instance, when I’m editing in 4K or 8K footage on my MacBook, working with proxies significantly speed up my workflow and allow for my video to playback smoothly while editing. There are other times where I’ve been working on complex project with numerous layers, graphics, color and audio effects and proxies helped keep my timeline responsive and smooth.
Proxies can also come in handy if you’re editing remotely and need to share files with collaborators, sending low-resolution proxies online instead of the full-resolution files can make file transfer quicker and more efficient.
In each of these cases, Proxy Editing ensures that you can maintain a fluid, efficient editing process without compromising on the quality of your final output. It’s a valuable tool in the videographer’s arsenal, enabling you to handle large files with ease in Premiere Pro.
Automate to Sequence
This feature allows you to quickly create a cut by automatically adding clips from the Project panel to your timeline.
The “Automate to Sequence” feature in Premiere Pro is a powerful tool that, as the name suggests, automates the process of adding clips to your timeline. This feature can be an immense time-saver, especially when working with numerous clips or when creating rough cuts of your footage.
To use this feature, first, select the clips in your Project panel that you want to add to the timeline. Then, go to the Clip menu and select Automate to Sequence. A dialog box will appear, allowing you to specify the order in which the clips will be added (based on selection order, sort order, or custom order), the placement of the clips (at the beginning, at the end, or at the current position), and whether you want to use the clip’s in/out range or the entire clip.
Once you’ve made your selections, click ‘OK’, and Premiere Pro will automatically add the clips to your timeline according to your specifications. This feature drastically reduces the time and effort required to manually drag and drop each clip onto the timeline, making your editing process more efficient.
“Automate to Sequence” also offers a range of options for sequencing your clips, including the ability to add transitions automatically. This means you can not only expedite the assembly of your rough cut but also add artistic choices in the early stages of the editing process.
Essentially, the “Automate to Sequence” feature is a great tool for streamlining very basic video editing workflow in Premiere Pro.
I will use this sometimes when creating a montage of video clips that I know I want to use, but I’ve found it to be the most helpful when creating a slideshow with a bunch of photographs.
By automating the process of assembling your timeline, it allows you to focus more on the creative aspects of editing and less on the tedious task of manual assembly. Whether you’re a seasoned videographer or a beginner video editor, leveraging this feature can significantly enhance your productivity and at least get everything in a sequence for you.
Export Settings
Understand the best formats and settings for exporting to different platforms. This could mean the difference between a video that looks top-notch and one that fails to meet the mark.
Understanding the best formats and settings for exporting your videos to different platforms is a fairly important skill for any video editor or videographer. When exporting your video, the goal is to balance file size and video quality while ensuring your video is optimized for the platform on which it’s being shared.
In Premiere Pro, when you’re ready to export your project, you’ll navigate to ‘File’, then ‘Export’, and finally ‘Media’. This will bring up the Export Settings window, where you’ll be able to customize a variety of settings for your final video.
Choosing a format depends largely on how your video will be viewed. For example, if you’re exporting for online streaming, H.264 is more than likely your best choice as it provides high-quality video with a smaller file size. This format is also compatible with many devices and platforms, including YouTube, Facebook, Instagram, and Vimeo.
Next, you want to set your video’s resolution. If you’re exporting for YouTube or Vimeo, a resolution of 1080p is a good standard to maintain a high-quality video. However, if you’re working with 4K footage, and you want to maintain that quality (which why wouldn’t you?), be sure to export in 4K. In the export media window inside of Premiere, there is a “Match Source” under basic video settings. This very helpful if you want both the frame size and frame rate to match your projects settings.
The Bitrate settings are equally important. A higher bitrate results in better video quality but also a larger file size. Different platforms have different recommended bitrate settings. For example, YouTube recommends a bitrate of 8 Mbps for 1080p video with a lower frame rate and 12 Mbps for 1080p with a higher frame rate.
For what it’s worth, YouTube has an entire guide on this that’s worth checking out.
Presets can be helpful, too. Premiere Pro includes presets for several popular platforms such as YouTube, Facebook, Mobile Devices, and Vimeo, which automatically adjust your export settings to the recommended values for these platforms.
Remember though that each video project is unique, and different projects might require different export settings. There are times where I’ll have to export a video a few times because the client will be sharing them on different platforms or mediums.
Understanding these export settings is critical to ensuring the final product looks as great, no matter where it’s being viewed. By utilizing these settings effectively, you can ensure your video not only looks great but is also optimized for your chosen platform. As a video editor, mastering this aspect of the Premiere Pro will undoubtedly elevate your video editing game.
Know that platforms are constantly changing, so next year’s ‘best settings’ may look completely different. Luckily, there are a lot of helpful tutorials on YouTube that will help guide you through.
Conclusion:
In conclusion, mastering these key features in Premiere Pro – from keyboard shortcuts to markers, editing with Proxies, and understanding the intricacies of Export Settings – can significantly enhance your video editing proficiency. These tools not only streamline your workflow but also open up new creative possibilities.
I was once told by a respected video producer who shared with me invaluable advice, “Know your camera and its settings like the back of your hand – be fluent in knowing how it works.” It’s a nugget of wisdom that has left a lasting impact on me. I believe this principle applies not only to videographers, but also to video editors in terms of their proficiency with editing platforms like Premiere Pro.
Spend time practicing your editing skills and remember, the art of video editing is a continuous learning process, and there’s always a new skill or technique to master.
I hope you’ve found these insights beneficial, and they help you level up your video editing game. Should you have any questions or require further clarifications, feel free to reach out.
I’m also available and would love to bring my expertise to your next video project. Let’s create some magic together. If you’d like to reach out to me, you can do so by filling out this contact form or emailing me at peter@watchpvk.com.

